:max_bytes(150000):strip_icc()/Save-the-Date-Mike-Radford-Main-0c7dd9e09ca84976bf1bd2985e18220c.jpg)
Photo by Mike Radford
In This Article
Aside from its practical importance—telling guests to put your wedding on their calendar—a save-the-date plays a second major role in your plans: It’s the very first impression you get to make, whether you’re hosting a relaxed beachfront ceremony or an extravagant and formal wedding weekend. What's more, if you're looking to add a few personal touches to your wedding aesthetic, creating a DIY save-the-date can be a unique approach to sharing essential information in your own way. However, assembling dozens (or hundreds) of cards yourself isn’t as straightforward as it sounds.
“A professional designer is your sherpa—they have years of experience to guide you in the right direction, keep you away from mistakes and faux pas,” says Kristin Hazelwood, founder of Hazelwood Paper Co., who also points out that the high-end materials and production processes professionals use are often more appropriate for milestone events like weddings. “A good designer will also brand your event so that it is cohesive from start to finish; say goodbye to the hodge-podge that comes with cobbling together pieces from various sources. All of this creates a lower stress environment so you can focus on the aesthetics and not the technical aspects.”
Meet the Expert
- Kristin Hazelwood is the founder of Hazelwood Paper Co., a boutique graphic design and stationery company based out of Dallas, Texas.
- Angelica Sun is the founder of Velvet Fox Designs, a full-service design and print studio that creates stationery and signage for weddings and other events.
- Emily Barry is the vice president of weddings at Minted, a shoppable stationery and art marketplace with designs created by a talented community of artists.
That being said, for couples who do want to tackle this project, we asked the experts to share their best tips for designing, printing, and personalizing save-the-dates. Here's everything you need to know.
How to DIY Save-the-Dates
Though not an easy task, making your own save-the-dates falls on the simpler end of DIY wedding papers, says Angelica Sun, founder of Velvet Fox Designs. “It’s not as difficult as invites or day-of signage—save-the-dates can be something that’s done on your own because the resources out there are tremendous.” In general, what's most important is that you pay attention to the details, and closely follow the below expert advice.
Finalize Key Information
While you don’t need every piece of your wedding plan in place before you send your save-the-dates, you do need to have a few details set in stone: Your date, location, and guest list. (Remember that etiquette dictates that everyone who receives a save-the-date must be invited to your wedding—though you can add wedding guests who didn’t get a save-the-date.) “The bride’s name traditionally goes first; for same-sex couples, consider alphabetical,” says Emily Barry, vice president of weddings at Minted. “Save-the-dates should list the wedding location by city, state, and country if it’s a destination wedding. The venue details themselves are saved for the invitation.”
Consider Your Color Scheme
Many couples harness their early-engagement excitement into sending save-the-dates before they’ve chosen an overall wedding palette. Don't fall for this mistake! If you have a color scheme, branding plan, or specific image you know you’ll include in your wedding, then you can incorporate it into your save-the-dates; if you’re not sure where your design will end up, then keep your save-the-date basic. “Keep your design as simplistic as possible so that it creates the platform for you to explore and dive deeper into your wedding aesthetic,” adds Sun.
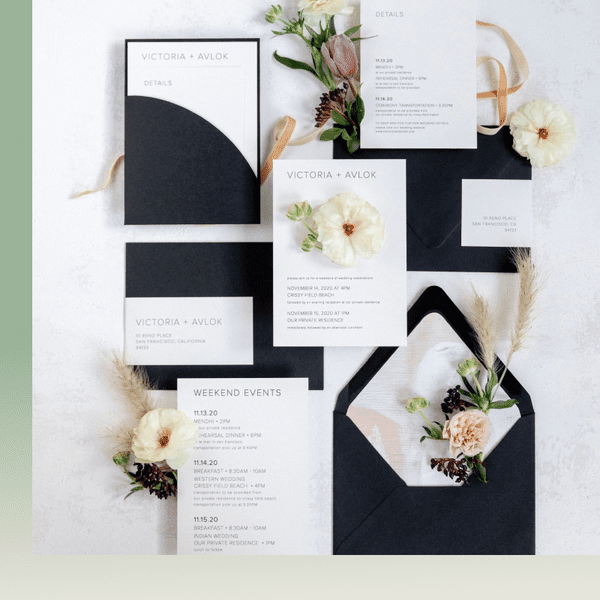
:max_bytes(150000):strip_icc()/Jill-Sherif_02-1ba273bc0f604c2aba4f02daf597cf48.jpg)
Photo by The Bold Americana
Dream Up a Design
Sun recommends browsing Pinterest, Instagram, and your favorite wedding planning sites for design inspiration, and paying close attention to the fonts, hues, and layouts that catch your eye. This research can also help you decide if you’d like to include an image—and whether you prefer a casual vacation selfie or a formal engagement photo. “We suggest browsing save-the-date designs before your photo session to get an idea for the styles that you’re drawn to,” says Barry. “Do you want a close-up of the two of you or perhaps a wide shot in a beautiful setting? Consider taking some shots with plenty of negative space that could be used for text.”
For a full DIY experience, start with a blank page (Sun recommends using Canva or a similar program to design from scratch); and for a semi-DIY save-the-date, look for pre-designed templates from Minted, Etsy, or other design sites.
Choose Your Fonts
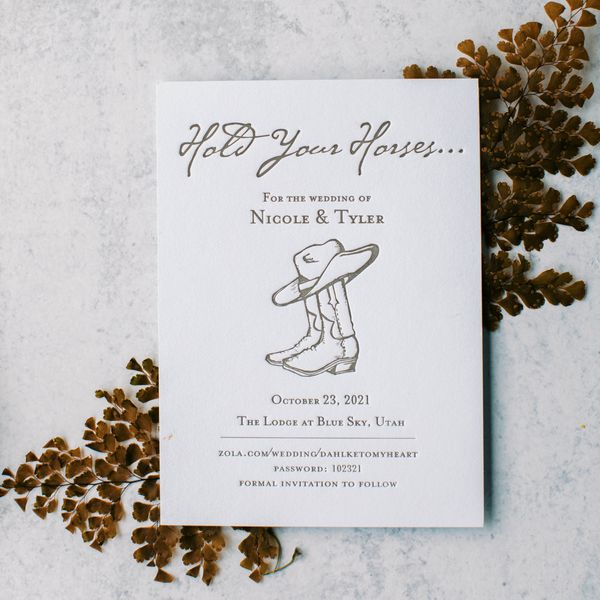
If you’re designing from scratch, you’ll also need to choose your own fonts. While wedding invitations typically include at least three fonts—a script, a serif, and a sans serif—in four sizes, Sun recommends keeping a save-the-date design to just two fonts in two sizes (one big, one small). “It gets a little too cluttered, depending on the fonts you chose,” she says. “For someone without a graphic design background, three font pairings would be really hard to find and use cohesively and elegantly.”
One common approach: Use a script or calligraphy font for the “Save the Date” heading in a 14-to-24-point size, and put your date and location in a serif or sans serif font in an 11-to-14-point size. “Serif is more classic, elegant, and royal, and sans serif is more modern, neutral, and fun,” says Sun. “Never go lower than eight point—if you do, you’re looking at a magnifying glass for readability.”
Additionally, when making your font selection, Sun recommends keeping your options classic and understated; some of her current favorites include La Luxes, Kinfolk, and Montserrat. “The font choice is important to keep not generic, but as versatile as possible,” she says. “Instead of choosing very bold styles, choose something simpler and more discreet.”
Add a Signature Color
If you know your wedding palette will focus on a specific shade or color family, then using that hue for your save-the-date font color will preview your aesthetic in a fun (and subtle) way. Still, says Sun, you don’t need to include every color you’re considering; keep the overall effect elegant and clean. “Even if you’re going for a nine-pastel-color wedding, your stationery doesn’t need to reflect nine colors,” she says. “Your wedding flowers are going to cover that.”
If you haven’t settled on a color palette, opt for a classic white card and a less-striking text color—like black, gray, beige, or taupe. “With neutrals, you can go from a classic black and white wedding all the way to a terra cotta boho wedding and, no matter what, you still have that neutral,” says Sun. “For brides that don’t know their wedding vibe too well yet, I would keep it as simple as possible. Otherwise, you’re locking yourself into a design and then later, you might have to make a hard decision about what doesn’t make sense anymore.”
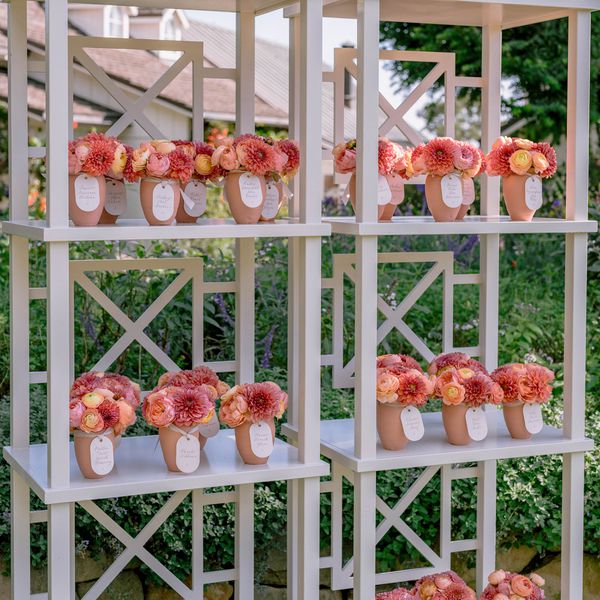
:max_bytes(150000):strip_icc()/RYP_CA-002-63e5b39e82b4485498d0fb7f32345956.jpg)
Photo by Rebecca Yale
Splurge on Paper (and Printing)
Even the most beautiful design falls flat on thin, informal paper. “If you're having a casual affair, you can probably stick with digital printing and basic paper,” says Hazelwood. “However, if you're having a wedding with a plated meal, your invitation should say that—with thick cardstock and upgraded printing.”
Whether you’re having your own design printed at a local print shop or ordering personalized cards from an online vendor, Sun recommends requesting samples of the paper that you can feel and touch before purchasing, allowing you to truly understand the difference between premium, matte, glossy, or satin finishes. She prefers a matte sheen on double thick—also called duplex—cardstock. “This is a wedding!” she says. “Standard cardstock paper is thick, but in my opinion, it’s not thick enough for the wedding industry.”
Another tip? While it may be tempting to print your save-the-dates at home, unless you have an extremely high-quality inkjet printer, turn to a professional print shop instead. Lower-end home printers often aren’t designed to print on double-thick cardstock, and most don’t print color well enough for a photograph-based save-the-date to come out clearly. Expect to print several cards on each page; Sun recommends including cut marks and investing in a cutter to keep your edges neat.
Plan Your Postage
When designing your save-the-date, consider postal service requirements for size, shape, and thickness; mailing a square card, adding a knot-tied ribbon, or including heavier embellishments can all increase the cost of mailing your save-the-dates. “That’s a huge learning curve,” says Sun. “You think it’s just beautiful design and hard work, but when it comes to the end and you send it off in the mail, you don’t realize that there are strict rules about this.”
Add a Personal Touch
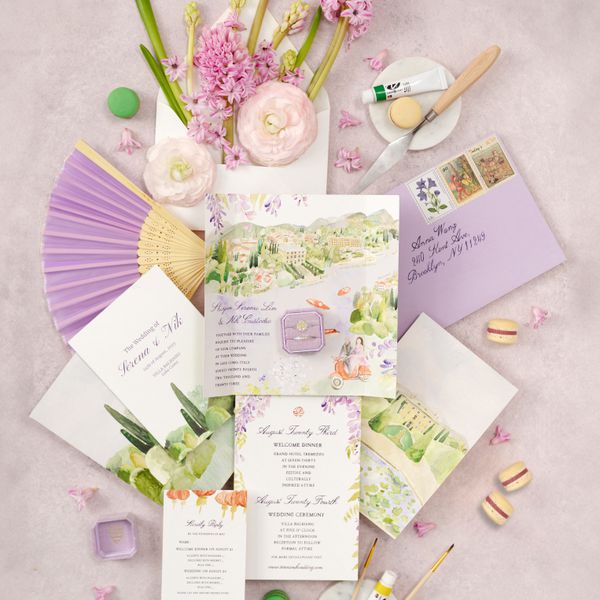
If you’ve opted for a semi-DIY option, you can still get creative with your cards. “Once your save-the-dates are in hand, there are so many ways you can continue to add a personal touch,” says Barry. “If you have great penmanship and want to show it off, you can address your envelopes by hand. Adding artful envelope liners, matching or custom wax seals, or finishing your envelopes with a chic assortment of vintage stamps (all of which you can find on Minted) can finish your save the dates to perfection."
The Pros and Cons of DIY Save-the-Dates
As it relates to the pros of DIY save-the-dates, for many couples, creating these paper goods becomes a fun, meaningful, and memorable way to begin their wedding planning. “When you work so hard, this is going to be way more important and you’re going to feel so good,” says Sun. For a small wedding, making your own save-the-dates may even help you avoid minimum charges with a stationer—a typical save-the-date order would be 50 to 100 items—though Sun says most stationers will happily work with you to bundle items created for different parts of your wedding.
The cons of DIY save-the-dates? You'll be putting a lot of time and energy into this one task. A professional can get your cards designed, printed, and mailed in a fraction of the time you’ll spend on layouts, print tests, cutting, and embellishments. “No matter if you’re doing 25 pieces or 200, it’s easier for a professional to get it done faster for you,” says Sun. Also, while you might save money by putting in your own labor, the final cost depends on the intricacy of your design, the materials you use, and your production techniques. “If you are the couple that went down the rabbit hole and bought a printer, a cutter, bought everything, you’re not really saving anything,” notes Sun. “You actually spent more—though you also set yourself up to make your own invitations.”