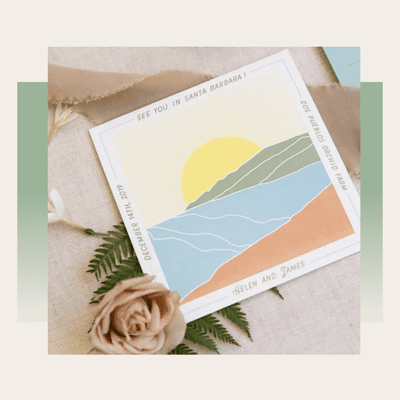
:max_bytes(150000):strip_icc()/recirc-diy-wedding-invitations-pastel-purple-garden-wedding-invitations-michellia-fine-imagery-0524-da441e69ee534a328db48bd1a3a685b5copy-fc09662fb5914155b4f5333dc9a6bfa3.jpg)
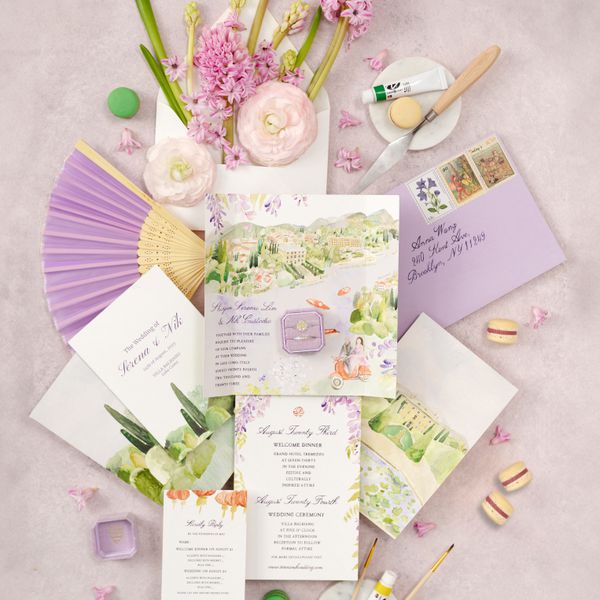
Photo by Michellia Fine Imagery
Designing and distributing wedding invitations is an essential task on any engaged duo’s planning checklist: These pieces of stationery contain all of the essential information invitees need to know about your nuptials, from the time and place of the event to the dress code, so your friends and family can properly prepare. Plus, these paper products create anticipation by teasing your big-day aesthetic. While many to-be-weds work with a stationery design studio to customize their invites, if you’re a crafty couple who’s looking for a way to express your creativity or cut costs, you might be considering the DIY route: designing and printing your own wedding invitations.
Meet the Expert
- Lilia Shatnaya is the owner and designer of Plume and Stone, an invitation design studio in Brooklyn, New York, that specializes in custom wedding and event stationery.
- Lia Griffith is the founder and creative director of her eponymous business, which offers templates, tutorials, and workshops to teach others how to create their own crafts.
- Christine Logan is the owner of Logie Paperie, a wedding stationery studio in Ontario, Canada. She’s been designing wedding invitations for more than 20 years.
There are so many different approaches to DIY wedding invitations: If you’re up for the challenge, you may decide to craft your entire stationery suite from scratch. You can also choose to personalize a certain aspect of your invites, whether it’s drawing a custom crest, sketching the border, or hand-calligraphing the text. Or, perhaps you download an online template for a minimal fee and customize it to your liking. According to Lilia Shatnaya, the owner of Plume and Stone, you also have the option of creating the design portion and hiring a stationery expert to print your paper products.
Whatever you decide, DIY wedding invitations will set the tone of your celebration in a unique way that will make your celebration even more meaningful and reflective of your love story. The prospect of taking on this multi-step project might sound overwhelming, so we tapped Shatnaya, in addition to DIY guru Lia Griffith and Logie Paperie owner, Christine Logan, to break down this process in an understandable-yet-comprehensive way. Wondering how to create DIY wedding invitations? Access our guide below.
Benefits of DIY Wedding Invitations
While outsourcing your big-day paper to a professional can definitely be worthwhile, tackling the project on your own can be just as effective. Here are some of the benefits of DIY wedding invitations.
They’re affordable.
Hand-calligraphed save-the-dates and letterpress wedding invitations are undeniably elegant, but hiring a professional stationery designer to create these products can be pretty expensive. If you’re searching for ways to stay within budget, creating your own invites can save you a lot of money. Many stationers and graphic designers deliver downloadable files that you can customize and print at home for a fraction of the cost of custom invitations suites and printing services.
They offer utmost personalization.
According to Shatnaya, many invitation companies mass-produce cookie-cutter invitations, but with DIY stationery, you can create one-of-a-kind invites that suit your specific wedding style and reflect your unique love story. “They can be tailored to represent the couple and their unique festivities by featuring elements, such as beloved pets, special places, and quotes,” she says.
They don’t require much time to make.
When working with a professional stationery designer, the process can be a time-consuming one. While some might deliver your order in a matter of days, for more elaborate invites, you might be waiting up to six weeks. With DIY wedding invitations, on the other hand, you can easily choose a template, customize it, and print it in a single afternoon.
:max_bytes(150000):strip_icc()/diy-wedding-invitations-groom-yellow-suit-mexico-wedding-invitations-jeremy-chou-0524-b07769be2e794a61b9fc7370cf936e5e-8166d8edee0048f2910fd6b2e93875fc.jpg)
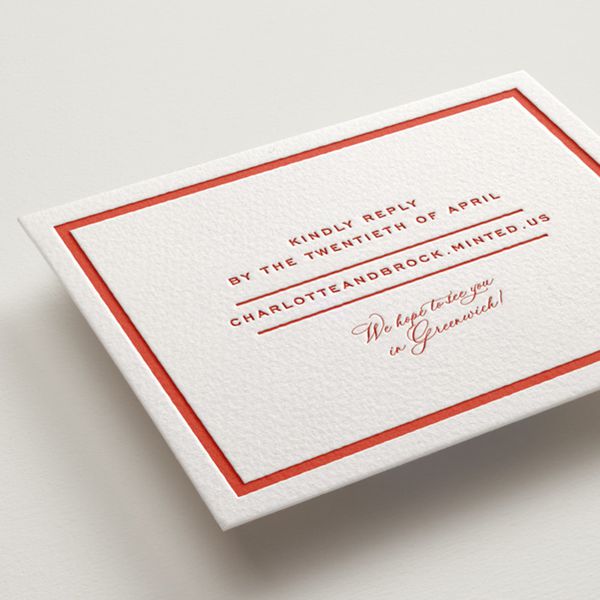
Photo by Jeremy Chou
Materials You’ll Need for DIY Wedding Invitations
Before you get started on your DIY wedding stationery, you’ll need to accumulate all of the necessary materials. “The materials you select will play a crucial role in the look and feel of your invitations,” Griffith says. Here’s a list of all of the tools you’ll need to purchase or set up beforehand.
Software
To execute a full suite, you’ll need to craft your designs on a digital application. For professional-level designs, Shatnaya recommends using a designer software on Adobe, like Illustrator, Photoshop, or InDesign. But for those who are looking for a beginner-friendly option, Canva and Microsoft Word will also suffice.
If you’d rather purchase premade templates, online companies, like Minted, Shutterfly, and Zazzle, offer stunning templates at affordable prices. Etsy also has many talented designers who will customize templates for you.
Paper
There are many different types of paper to choose from for your DIY wedding invitations. Uncoated cardstock—with a high-quality, luxurious look and durable feel—is the most popular choice. For a more textured look, you can opt for paper with a cotton, linen, or felt finish.
Logan suggests heading to a specialty stationery store or print shop to choose your paper. "Visit them and ask to feel the paper to see if it will be up to your standards," she says. These specialists will also help you select the best size and weight for your at-home printer. Shatnaya encourages you to take a few samples home to test on your printer before you fully commit. You can also find pre-cut cards at craft stores for a relatively cost-effective price.
Printer
In order to display your designs on paper, you’ll need a compatible printer. You can use a regular printer to print out your DIY wedding invitations, but double-check that it can handle the weight and size of your paper—most standard printers can accommodate cardstock up to 80 pounds. If you don’t have a printer at home and don’t want to splurge on one, you also have the option of sending your file to a larger printer at Costco, Office Depot, or a nearby printing shop. Remember to have enough ink, too.
Paper Cutter
If you’re printing your designs at home and you didn’t purchase pre-cut paper, Shatnaya advises using a paper cutter to acquire straight edges quickly. Plus, you can use this device to cut smaller pieces of paper for your insert cards. Griffith says a craft knife with a metal ruler is also a sufficient alternative.
Embellishments
To elevate your invitations, consider adding embellishments. “I often emphasize the importance of tactile details, so don’t hesitate to explore different textures and finishes,” Griffith notes. Shatnaya suggests ribbons, wax seals, or envelope liners, but feel free to choose any additional elements that suit your aesthetic, whether it’s gold leaf for glamorous functions, lace for a romantic gathering, or faux flowers for garden nuptials.
Envelopes
Finally, you’ll need envelopes to stuff each element of your suite into. “You can buy pre-made envelopes in a coordinating color or make your own using envelope templates,” Griffith mentions. Be sure to purchase envelopes that are a bit larger than your cardstock, so each invitation has room. And don’t forget to order envelopes for RSVP cards.
An Adhesive
To seal your envelopes, Griffith says to use glue dots or double-stick tape, rather than traditional glue. She also suggests using this method if you’re assembling layers or adding envelope liners.
How to Create DIY Wedding Invitations
Once you’ve bought all of the appropriate materials, you can begin working on this DIY project. To effectively design your invites, follow the below steps.
Identify Your Design
First and foremost, you’ll need to determine the look and feel of your invites, whether it’s a modern and minimalist single card or a bold and colorful folded design—plus, any illustrations you want to include. Consider your wedding aesthetic, and plan your design accordingly. Griffith encourages you to keep your printer type in mind, too. “Designs with more white space and lighter color backgrounds will look better on home printers,” she says.
If you need some inspiration, consider scouring Pinterest for design ideas—including illustrations, colors, fonts, and decorative elements—that correlate to your vision. Once you have an idea of the tone of your invitations, Griffith suggests sketching your ideas.
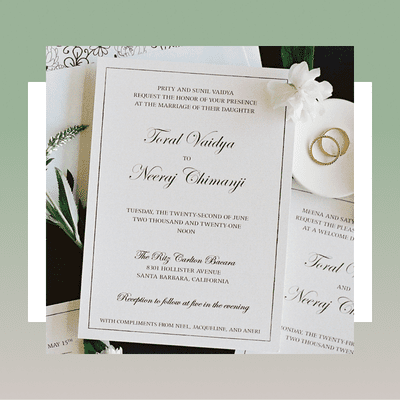
Figure Out the Wording
The wording that you use is just as important as the design. Before creating your DIY wedding invitations, figure out what you’re going to say. Logan explains that it’s important to select a tone that reflects your wedding aesthetic and your own personality, from traditional to conversational. For example, if you’re throwing a black-tie affair, consider using a formal tone.
Create Your Layout
Once you have an idea of the aesthetic and tone, it’s time to bring these ideas to life. Whether you use an Adobe application or a free-to-use online tool, during this step, you’ll design your invitations and all of your inserts. For a professional look, it’s advised to create a full bleed, meaning the design reaches the edge of the paper without showing any white margins. You’ll accomplish this effect when cutting your cards, but during the design phase, be sure to center the DIY invite on your page—with plenty of room to neatly trim. A word of caution: If you’re printing at home, most home printers aren’t well-suited for a full-color job (which can lead to imperfections and discoloration), so instead of a colored background, you may want to opt for a white backdrop with colorful illustrations.
During this stage, you’ll also add all of the essential pieces of information—like your names; the date, time, and place of your nuptials; RSVP details; and any other noteworthy tidbits—in your designated tone and colors. And you’ll also incorporate visuals, whether it’s an illustration of your venue, a floral border, or your joint monograms. If you’re using a premade template, you can also ask a designer to make any additional adjustments.
Proofread the Product
Before you print your final product, thoroughly review the design and proofread the wording—and have a few other eyeballs look over it, too. "Have a third party read the words to check for errors and spelling mistakes," Logan says. "I would also suggest reading it out aloud to check for grammatical errors."
Save Your File
After you’ve double-checked that the text and design are up to snuff, save your file. Logan says a PDF will print with higher quality than a JPEG. She also recommends a template resolution quality that is at least 300 DPI, which will create a crisp result.
Print Your Invitations
Now, it’s time to print! To fully embrace the DIY concept, use your home printer. First, though, Griffith suggests running a few tests since these types of printers usually display images that are a shade or two darker than your digital design. You’ll also want to ensure the text is legible and saturated. As you complete each test, adjust the settings accordingly until you’re satisfied with the color balance.
If your design has a full-color background or you aren’t too sure about your printer’s abilities, Griffith recommends visiting an office supply store that offers digital printing or working with a professional printer for precise color-matching and cutting.
Cut Your Cards
With your fresh prints in hand, next, you’ll grab a paper cutter or craft knife to cut your invitations down to the right size. The standard size of invitations is five inches by seven inches, but additional inserts will have a range of lengths and widths. Like we mentioned above, aim to create full-bleed invites.
Assemble Your Invites
Next up? Assemble your invitations. This entails placing your inserts inside of the corresponding envelopes, sealing them, and adding adornments (like tying a ribbon around the cards or applying a wax seal), according to Griffith.
Head to the Post Office
Before mailing your invites, pay a visit to the post office to determine the correct postage, which will depend on the total number and weight of your wedding invitations. “When everything has been assembled, it is very important to take one full suite to the post office to weigh it and have the USPS tell you the exact number of stamps you will need,” Shatnaya explains. If you’re hoping for hand-canceling to avoid potential ripping or damage, mention that to the postal worker while you’re calculating postage.
Stamp and Address Your Envelopes
Once you’ve received the exact specifications for your postage, address each envelope and add the correct number of stamps. While you can always use your own handwriting for this part of the process (which Griffith says offers “a personal, elegant touch”), you can also opt for printed labels.
Mail Them
Finally, return to the post office to mail your DIY wedding invitations. It’s recommended to send your stationery six to eight weeks before your big day.
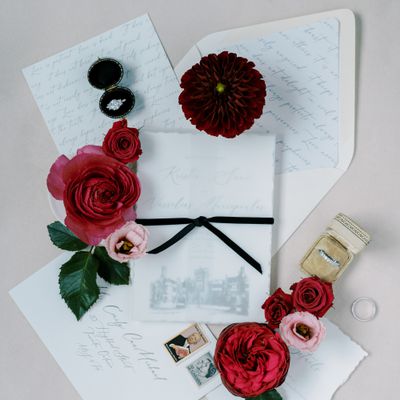
:max_bytes(150000):strip_icc()/diy-wedding-invitations-romantic-jersey-city-winter-wedding-invitations-niki-marie-photography-0224-745c692b3ebb458aaedc4726ea891cc7-3b1029cf890f4d2f8228cfead033ae87.jpg)
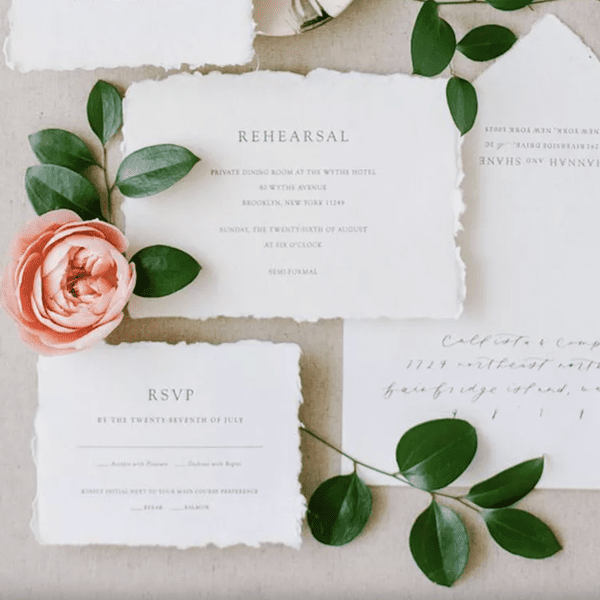
Photo by Niki Marie Photography
Tips for a Successful DIY Wedding Invitation Process
While following the above steps will contribute to beautiful DIY wedding invitations, to guarantee a successful journey, keep these additional expert tips in mind.
Give Yourself Time
Griffith advises setting aside plenty of time to plan and craft your DIY wedding invitations. “Rushing through the process can lead to mistakes and unnecessary stress,” she points out. Start the design process at least four months before your wedding, so you can finalize the design and wording and address your envelopes well in advance.
Estimate the Cost
Even though DIY wedding invitations are comparatively more affordable than traditional wedding stationery, they will still take up a portion of your budget—and there are certain materials and printing methods that are more costly than others. To stay within your set price range, Shatnaya advises sourcing the items to gauge the potential cost. “Figuring these things out before designing your invitations is one way couples can set themselves up for success and to guarantee their invitations turn out great,” she says.
Invest in High-Quality Tools
For professional-looking invitations, Griffith suggests investing in excellent tools, like a trusty paper trimmer and a quality printer. If you have the budget, you can also book a professional printing service, per Griffith.
Stay Organized
Since producing your own wedding stationery involves a lot of different materials, Griffith encourages you to keep everything in one area. Otherwise, you might misplace one of the items, which can put you back—both in terms of time and money. She also mentions following a timeline to keep yourself on track.
Ask for Help
If you need a few extra hands to sketch your design or meet your deadline, don’t be afraid to ask for help. “Whether from a crafty friend or a professional designer, a little support can go a long way in achieving flawless results,” Griffith notes.
How to Make Your DIY Wedding Invitations Unique to You
One of the biggest appeals of DIY wedding invitations is the opportunity to create personalized pieces that are representative of your relationship. Follow these tips to do just that.
Integrate Symbolic Touches
To give your guests more insight into your love story, decorate your invitations with meaningful symbols that capture your partnership. “For example, if you both love to travel, you could include a small airplane or map design,” Griffith poses. “If your relationship began at the beach, seashells or waves can be a subtle nod to your love story.” An illustration of your pet, the logo of your favorite sports team, or a shared hobby are also fair game.
Tease Your Wedding
Incorporating elements of your venue and aesthetic into your suite will hint at your forthcoming celebration and aid in everyone’s excitement. “You might use earthy tones, kraft paper, and twine for a rustic barn wedding,” Griffith proposes. “Consider metallic accents, modern fonts, and sleek designs for a glamorous city wedding.”
Share Meaningful Words
If there’s a quote, a Bible verse, a song lyric, or a poem that resonates with you and your future spouse and signifies your union, consider adding it to your stationery design. “Choose words that reflect your love story or the values you hold as a couple, and place them prominently on your invitation or as a subtle detail in the design,” Griffith notes.
Include Handmade Elements
Want to make your DIY wedding invitations truly distinctive? Include handmade elements, whether that be a hand-painted illustration or a handwritten message. You can also create a custom crest that’s symbolic of your specific relationship.